

 Add to favorites
Something we had been dreading since we got our van was taking our caravan washing machine out. We knew it was going to be a big job if it broke or needed replacing. Those who have the same set up know the struggle is real.
For us, our washing machine is used as you would in any household. I would rather wash my smalls and sheets in my own machine. Also, when we’re out in woop woop and Larry’s working on a station there isn’t a launderette for km.
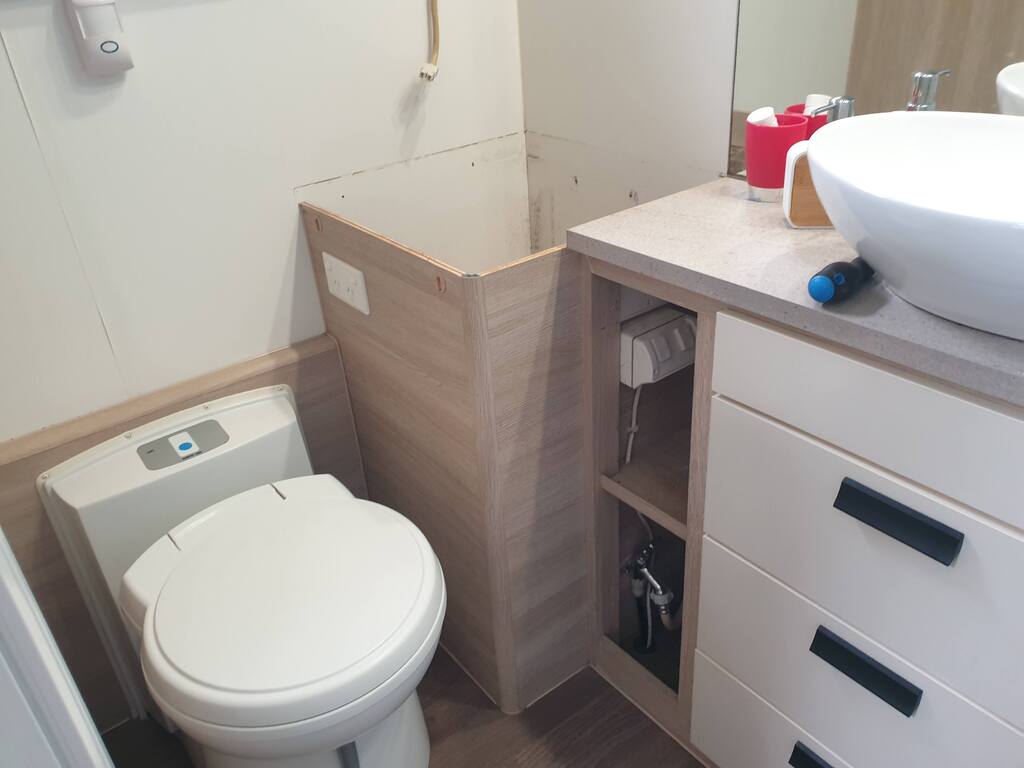
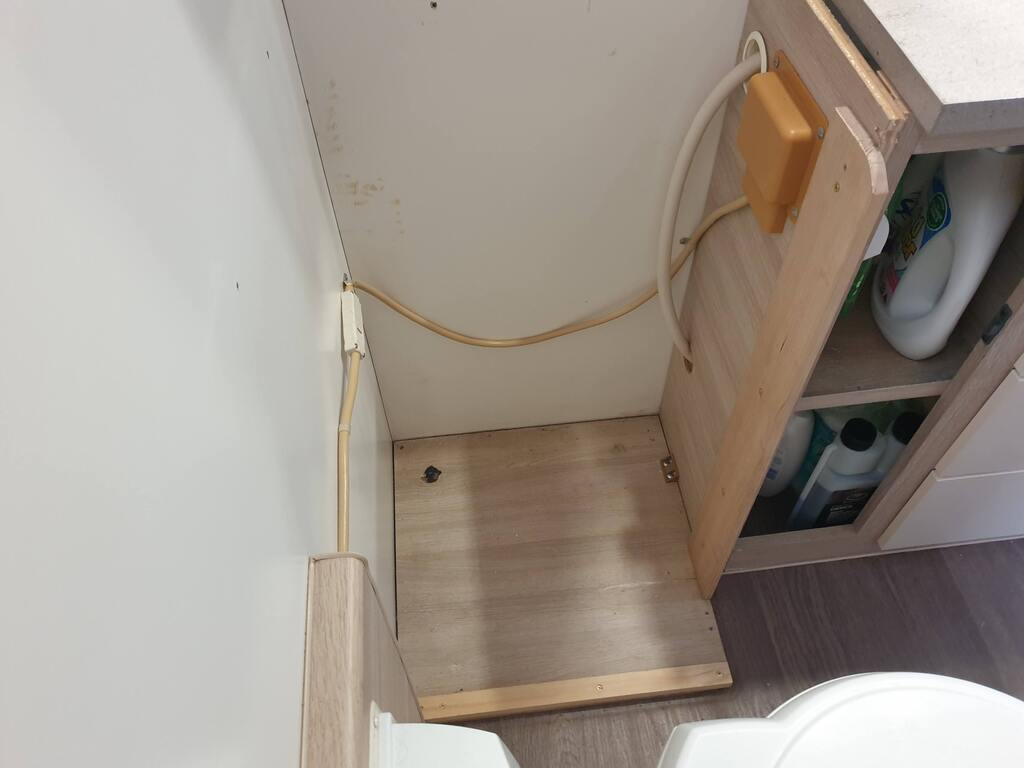
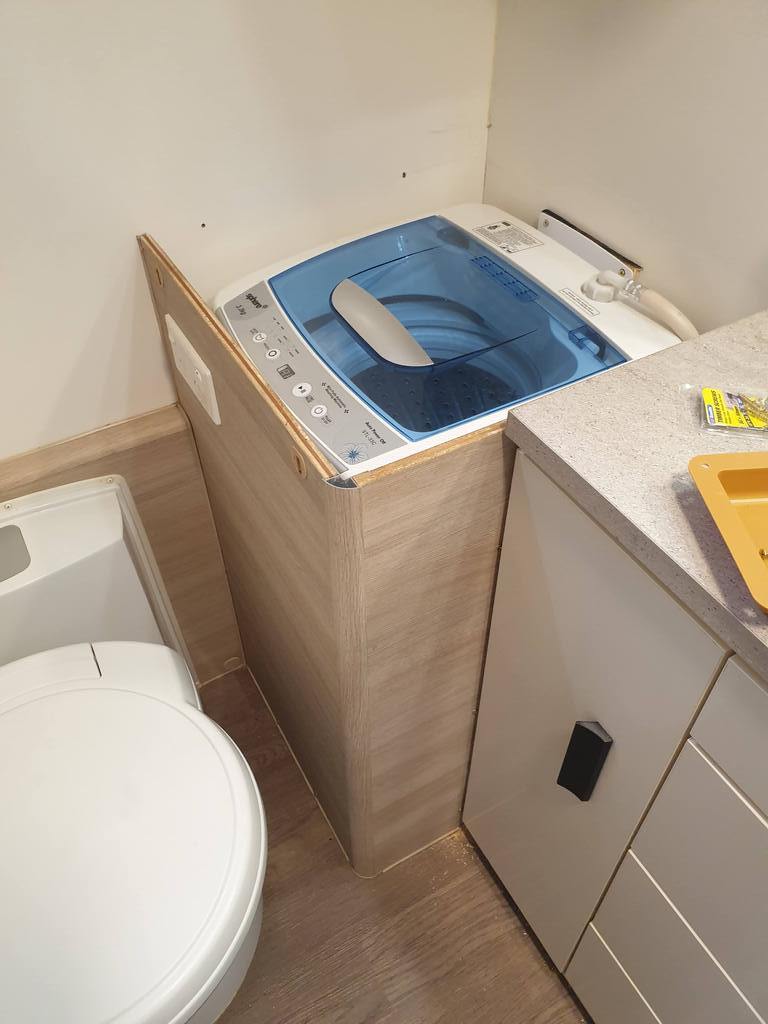
In our Jayco Starcraft 2016 the washing machine is located in the corner of our on-suite next to the toilet. Tightly stuck behind a wood surround and has a cupboard above it. Not being able to take it out forward or upwards.
Up until now we had had little glitches, like the spin cycle not kicking in when it should. That is until we turned it on and off again as you seem to have to do with electronics these days. Until now, that old chestnut had worked for us. No more!
After turning our machine on and off several times and it still not spinning, it was obvious to us we had to take it out. We had so many questions. How do we go about taking our caravan washing machine out ? Do we have to take out the whole vanity or the top cupboard? Can we take the toilet out and do it that way? Do we try and fix it or do we buy a new one? How long do we have to wait for a new one to arrive? If we take it out and put a new one in, will we have the same issues taking it out next time? All these questions and more ran through our heads.
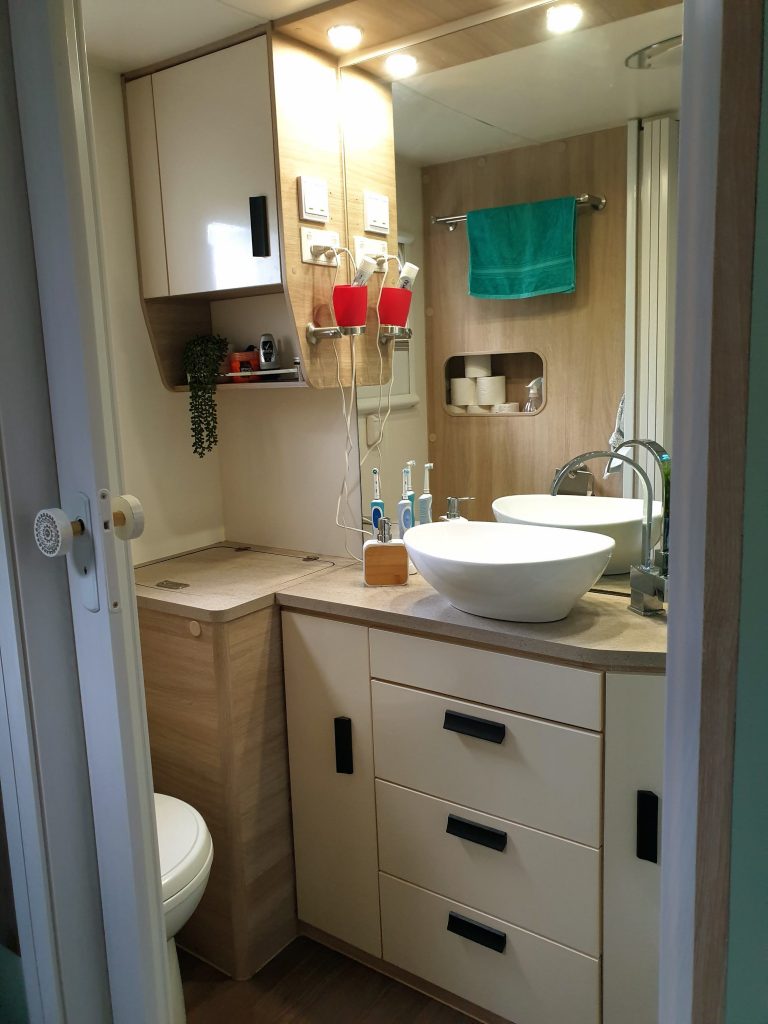
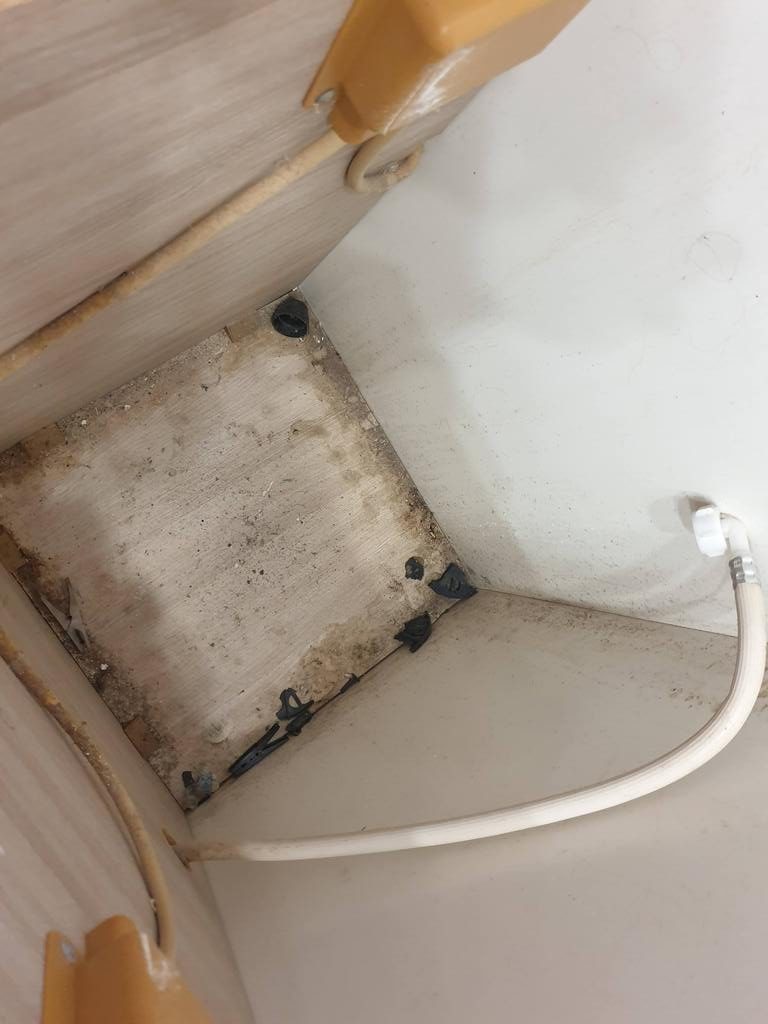
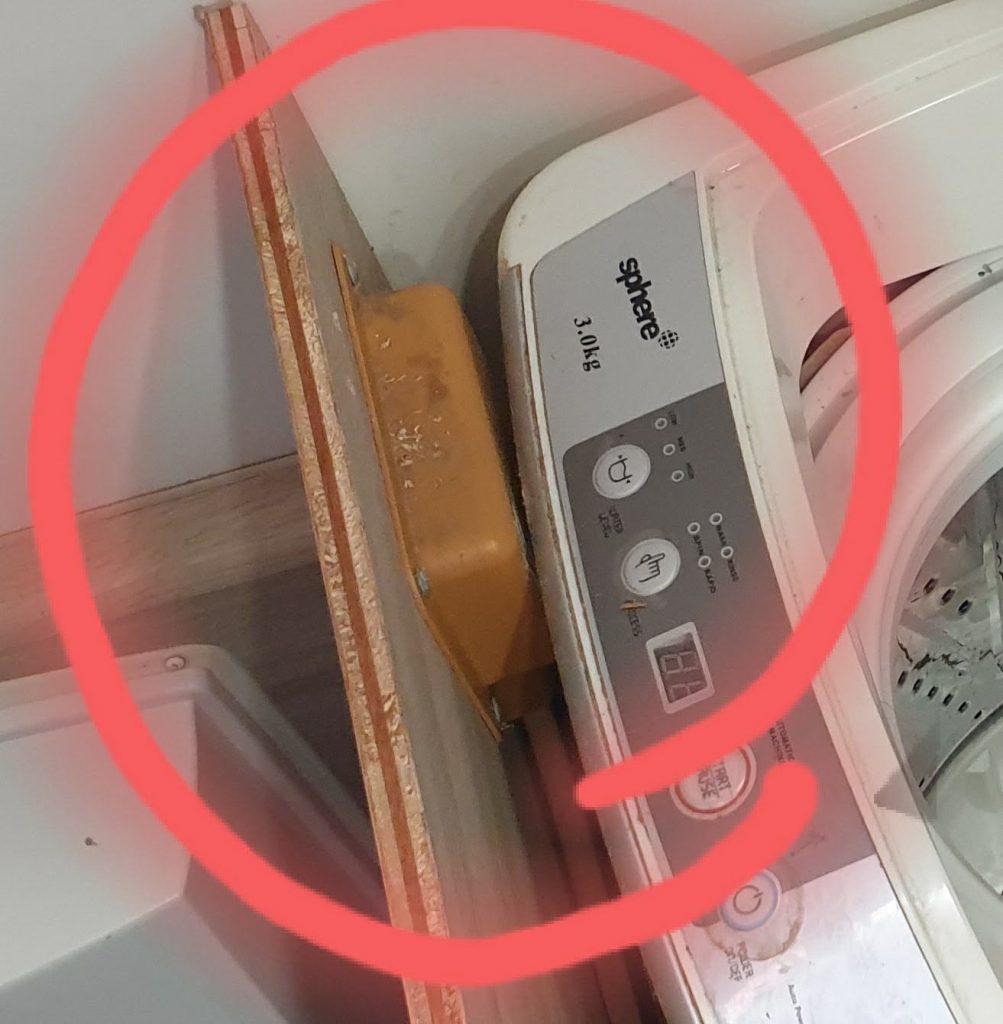
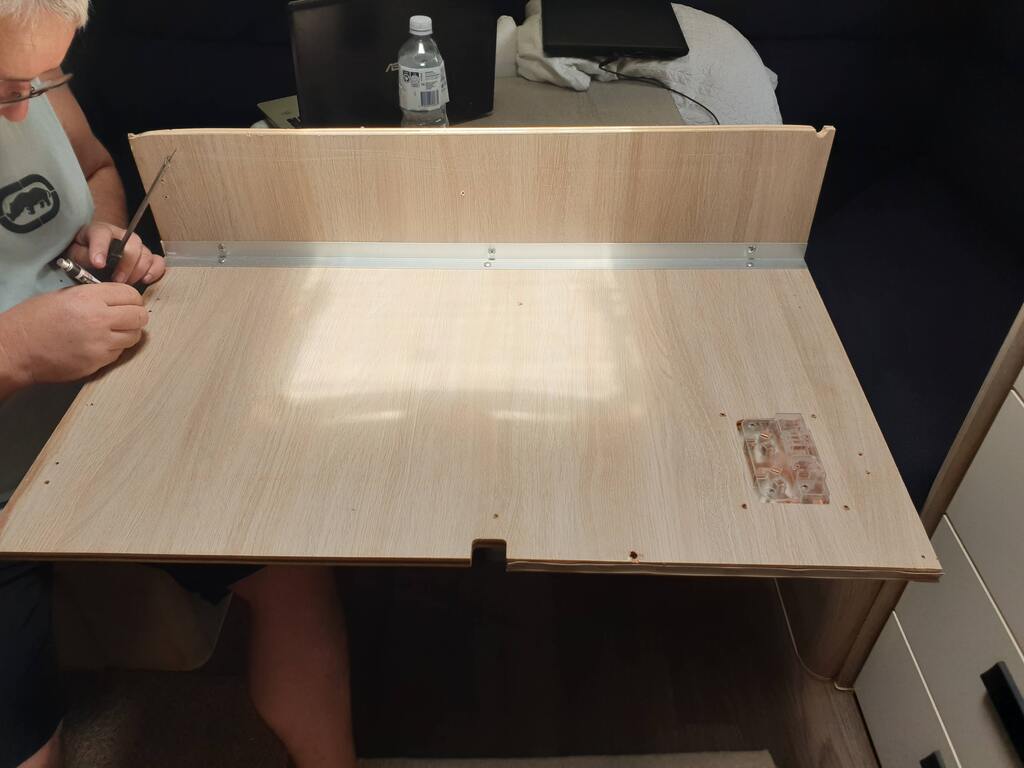
My photo above is of our on-suite and is actually the finished look, once we dismantled the cabinet and put it back. Can you see the cut we made and new screws? I can’t 🙂
Looking at the photo below, you can see the new 2022 Jayco caravan, they have left the front section off. They must have learned how inconvenient it is. Personally I think it looks unfinished and they could do much better. Keep reading to see how we did it & check out our full video at the end.
Just to note: The Sphere 3.3kg operation manual actually says “Step 1: The machine must be installed in a serviceable area, this must not be mounted or installed within a concealed cupboard or in a hard to service location. Should a service under warranty be required this cost of accessing the machine is not covered by the warranty terms”.
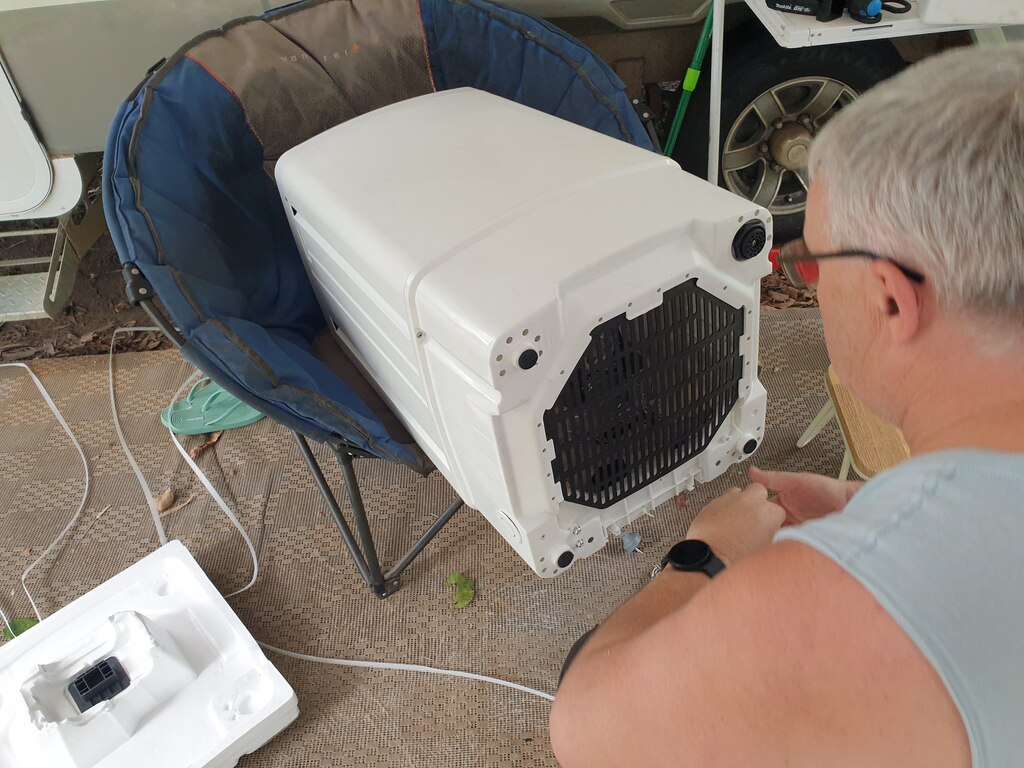
Taking our caravan washing machine out, I could see how disgusting it had got over the years. Working on outback stations with dirt, dust and dirty uniforms the poor machine looked sad. I couldn’t clean the front of the the washing machine or get to the underneath of it. As someone who likes things clean and tidy I feel embarrassed that it looked like that.

After lifting the machine out, we noticed broken bits of plastic under it. Larry took it outside and pulled it apart to see if he could see an issue. He thought it might have been the belt but that looked ok. Larry being an ex-mechanic can and has fixed a multitude of machines, big and small. But, not wanting to go through the rigmarole again and it being a bit touchy, we decided to plunge for a new one.
Looking online for the same machine as we knew it would fit back in the hole, we chose another 3.3Kg Sphere caravan washing machine. It had worked well for us over several years, until recent times. This machine was roughly the same price wherever we looked. Postage however differed greatly from site to site. Larry found one on Outback Equipment with free delivery. I had a google for a discount code for them and found one for 5% off. In the end the total price was around $385 including delivery.
I thought our caravan renovations were over once we re-upholstered our caravan club lounge and did a makeover on our caravan cupboard doors. I was wrong!
The biggest dilemma, was that with no door in the front of the bathroom cabinetry and no screws on the outside, taking it out was not so easy.
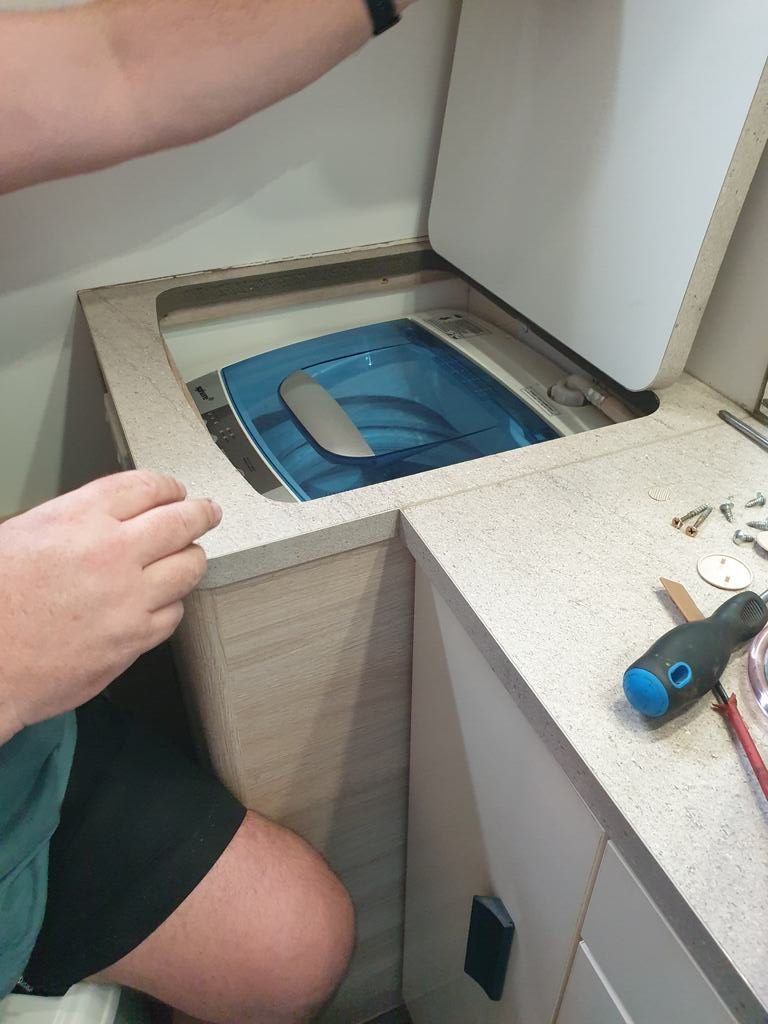
First step in taking our caravan washing machine out was removing the lid in the bathroom bench. The same with the top of the bench. This part also had to be prised off as it had been stapled to the back wall and bathroom vanity. From the looks of it, the machine was put in before the back wall was put in place.
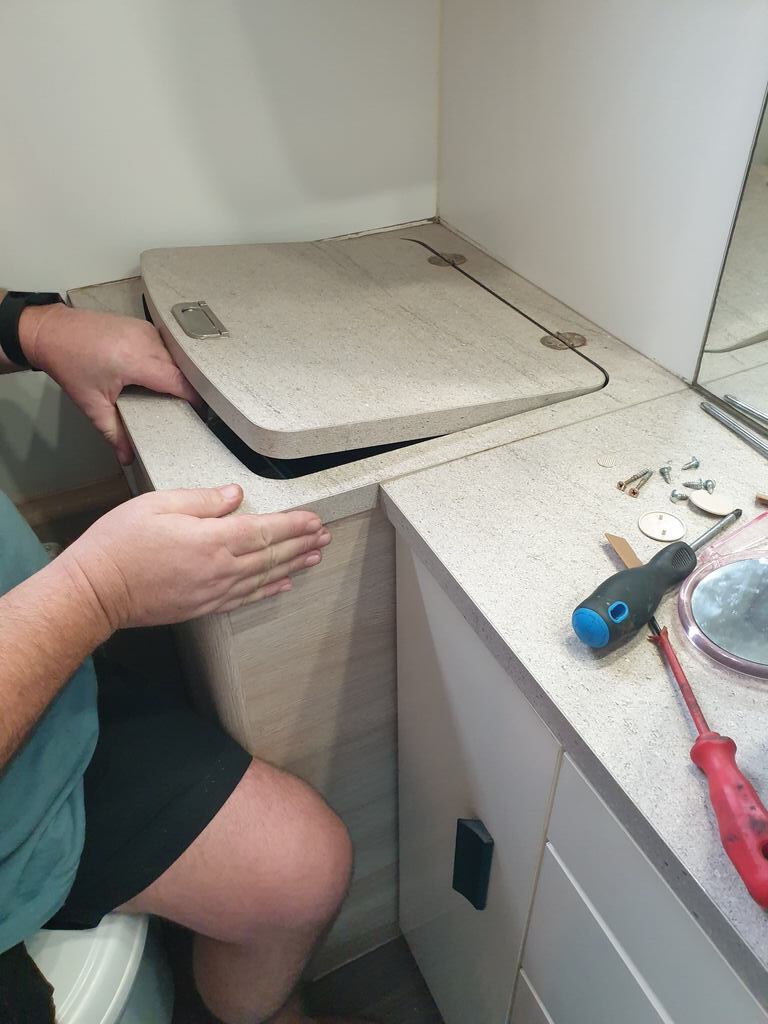
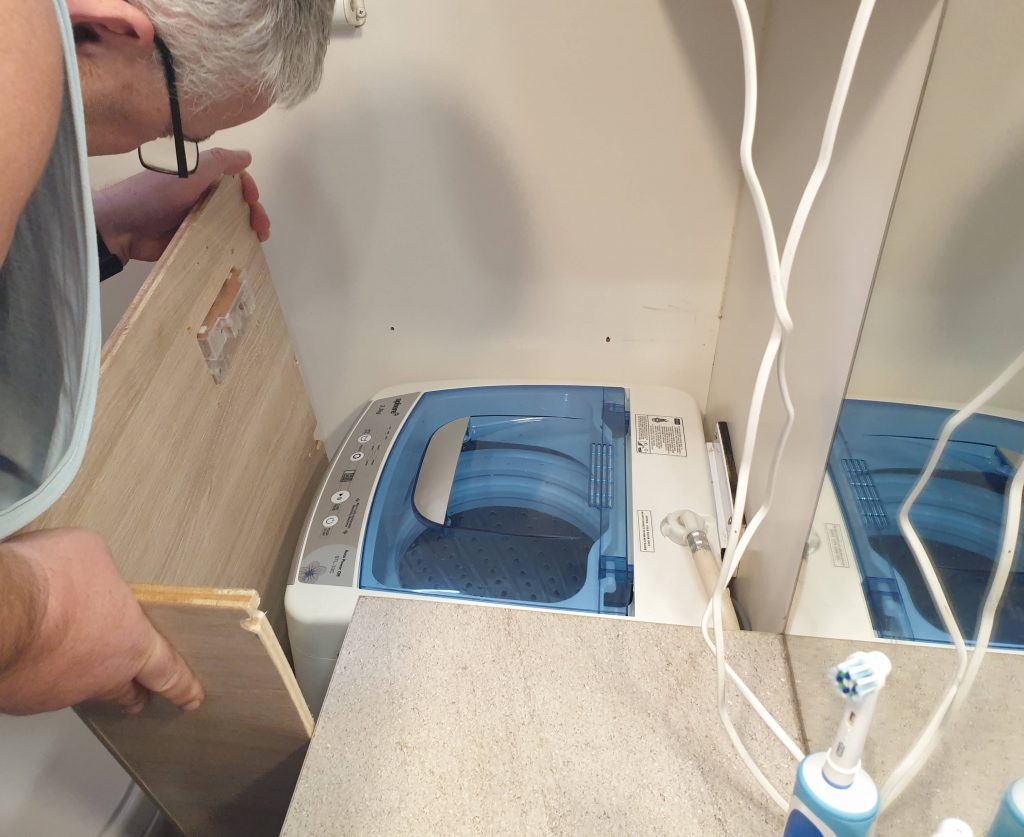
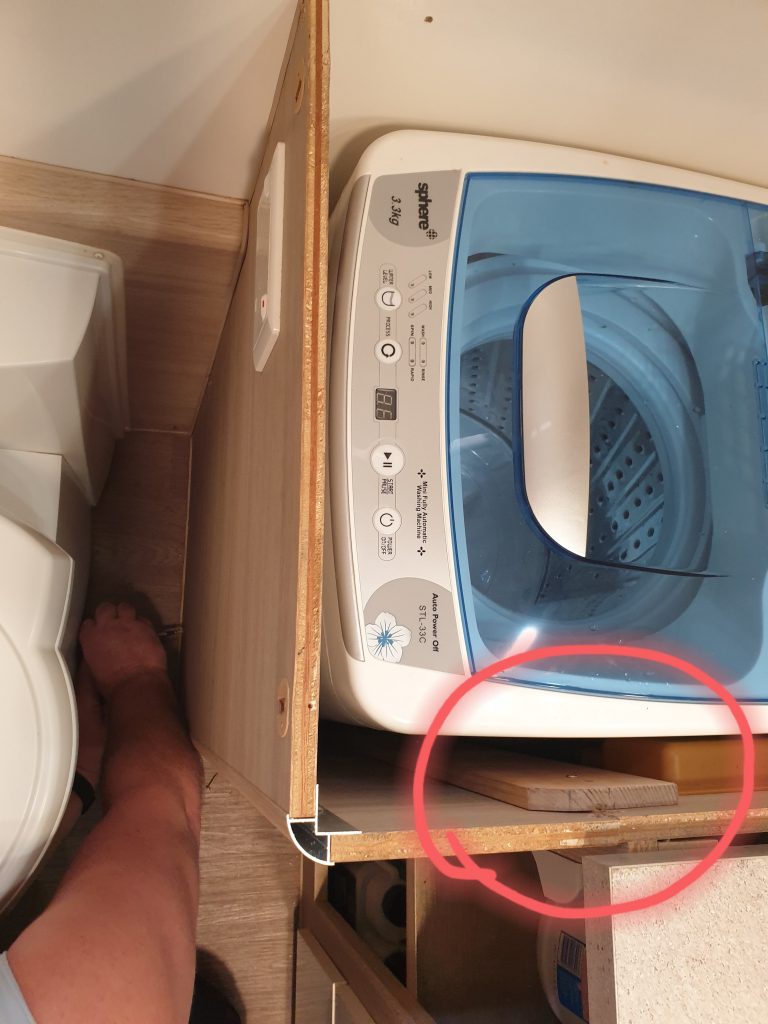
Now we could see more clearly how hard it was going to be, taking our caravan washing machine out. The front of the machine was jammed hard against the electric point, meaning, lifting the washing machine and leaning it forward to lift it out was not an option. Moreover, the cupboard above was also in the way.
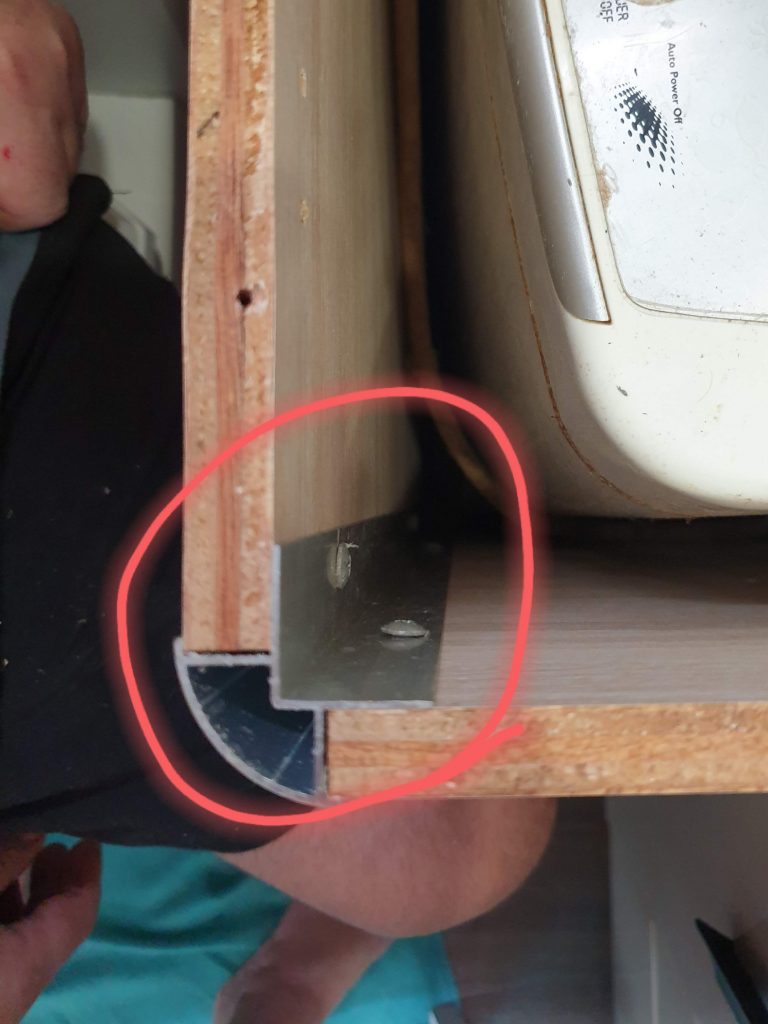
Looking more closely, a bracket was holding together the two sides of the cabinetry as well as brackets holding the cabinet to the floor, all of which had screws accessible from inside the cabinet area. This meant, too remove the cabinet one has to remove the washing machine first.
I did ask on our Full Time Caravanning Facebook page if anyone had taken one out in similer circumstances. A few people said to take the toilet out. Even if we had taken our toilet out, as well as the back toilet wall, the surrounding cabinetry would still be attached to the sink vanity from the inside.
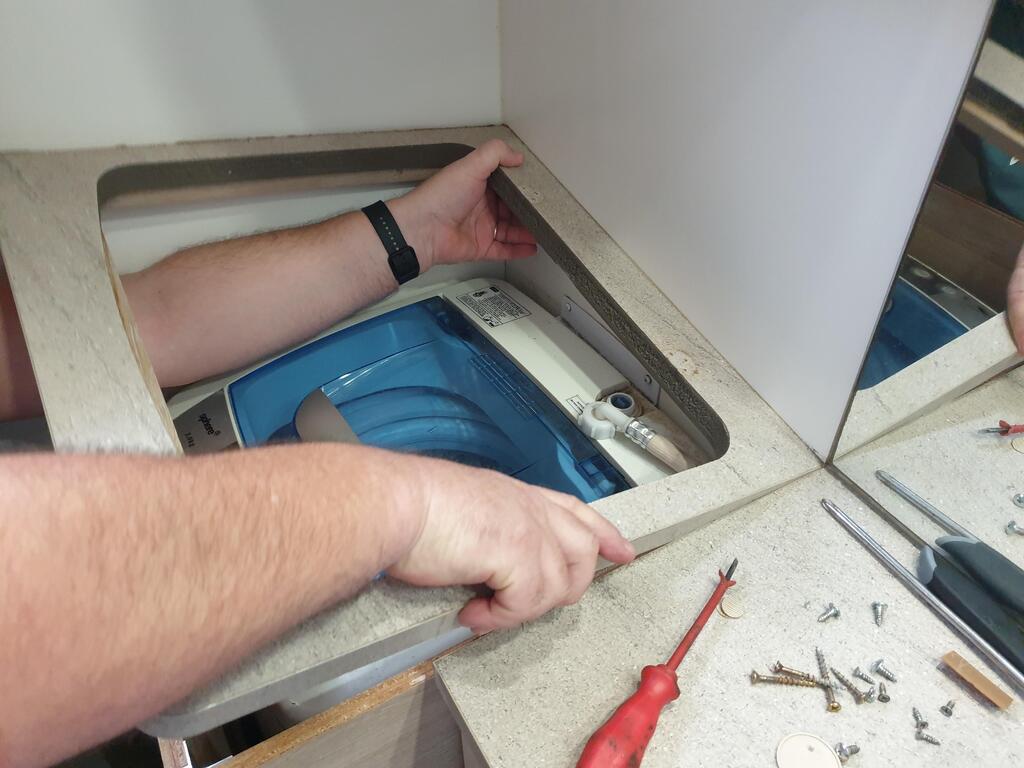
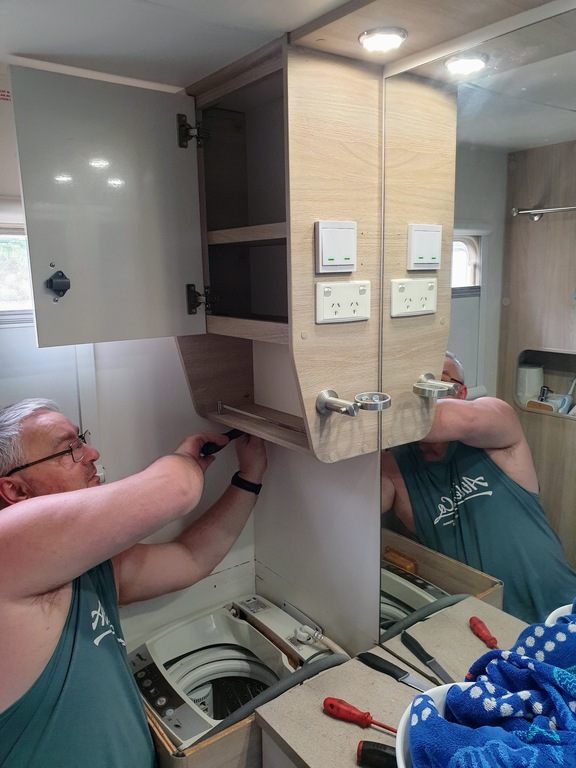
Taking out the above bathroom cabinet and lifting the washing machine out was our only option. And that wasn’t as easy as we thought. After removing all the screws we could see, the cupboard still didn’t want to come down.
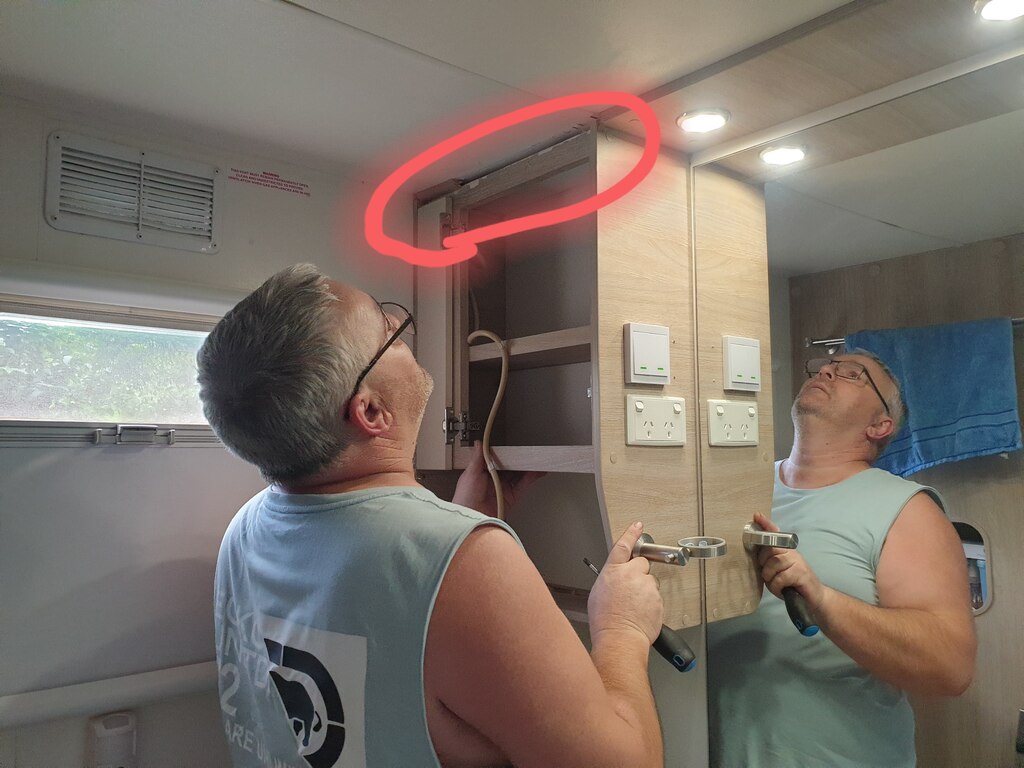
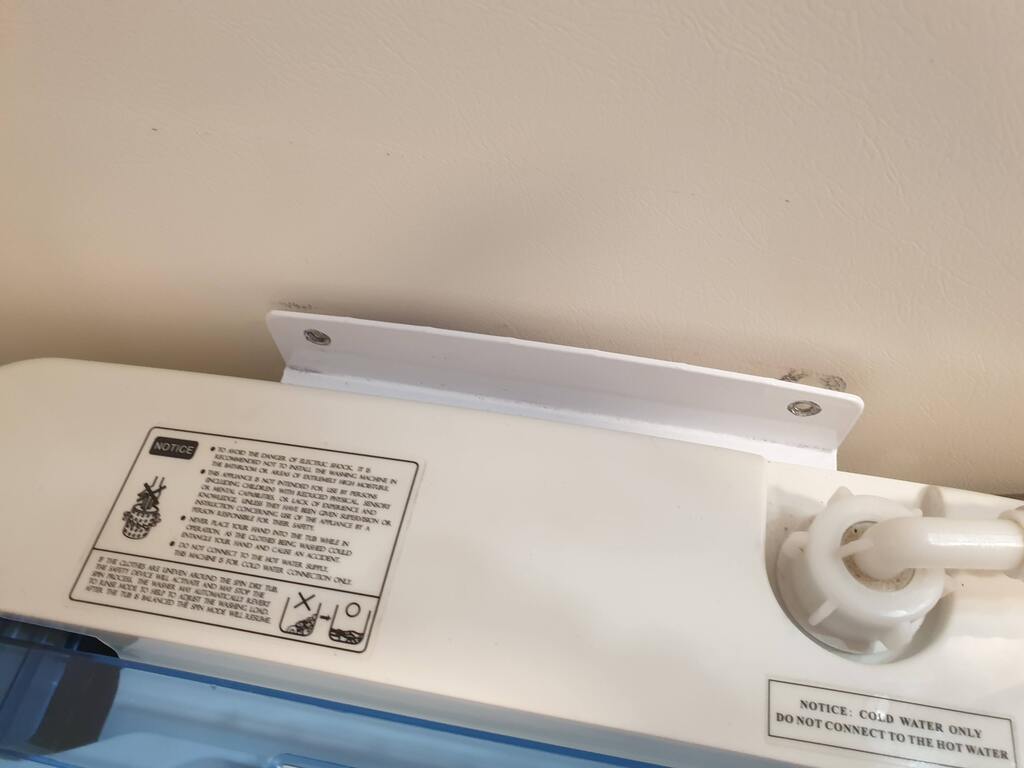
Prising the trim off the ceiling was also a bit of an issue, as it broke in half. Not a big deal though as it could be replaced easy enough. In the end, one sneaky screw was still in the corner of the ceiling, which we could feel, but not see. The trim was glued back in place and you can’t see the join.
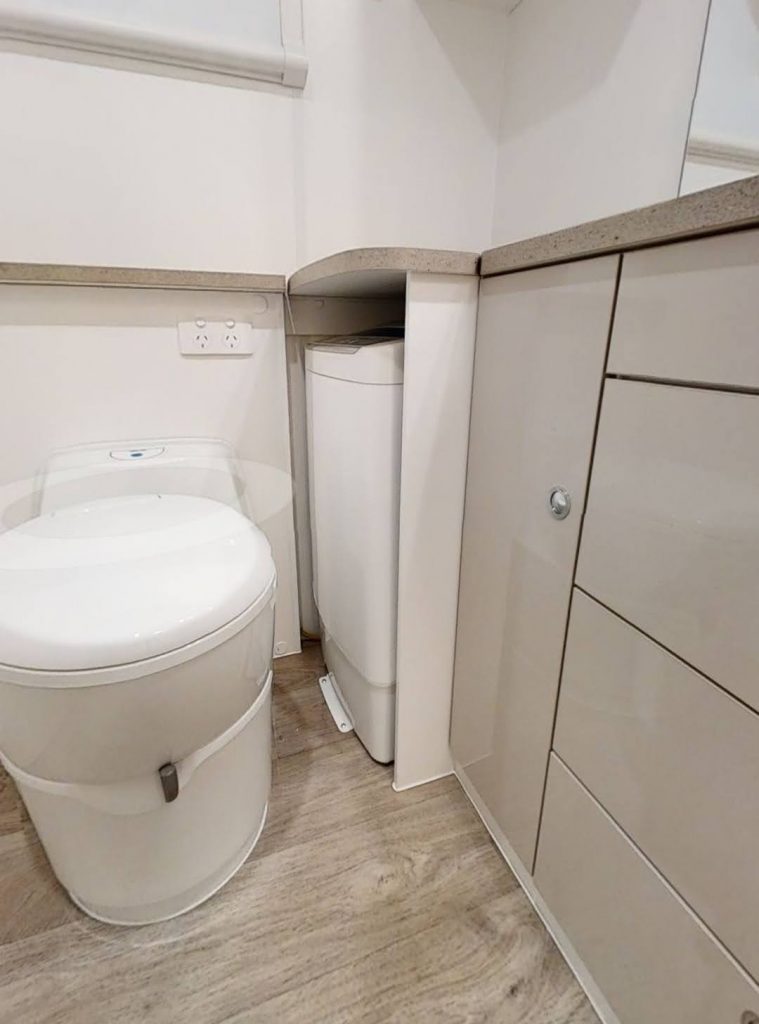
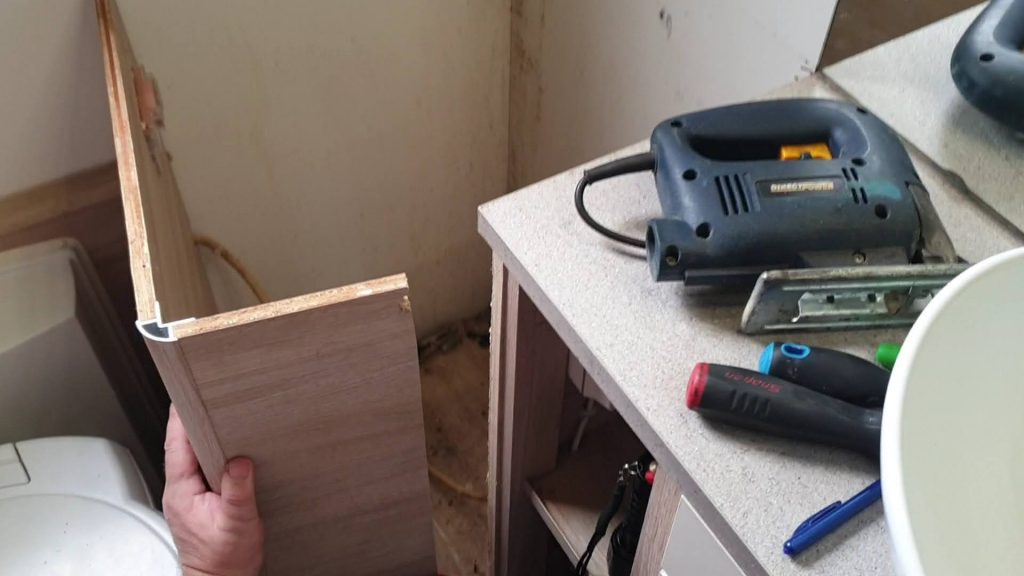
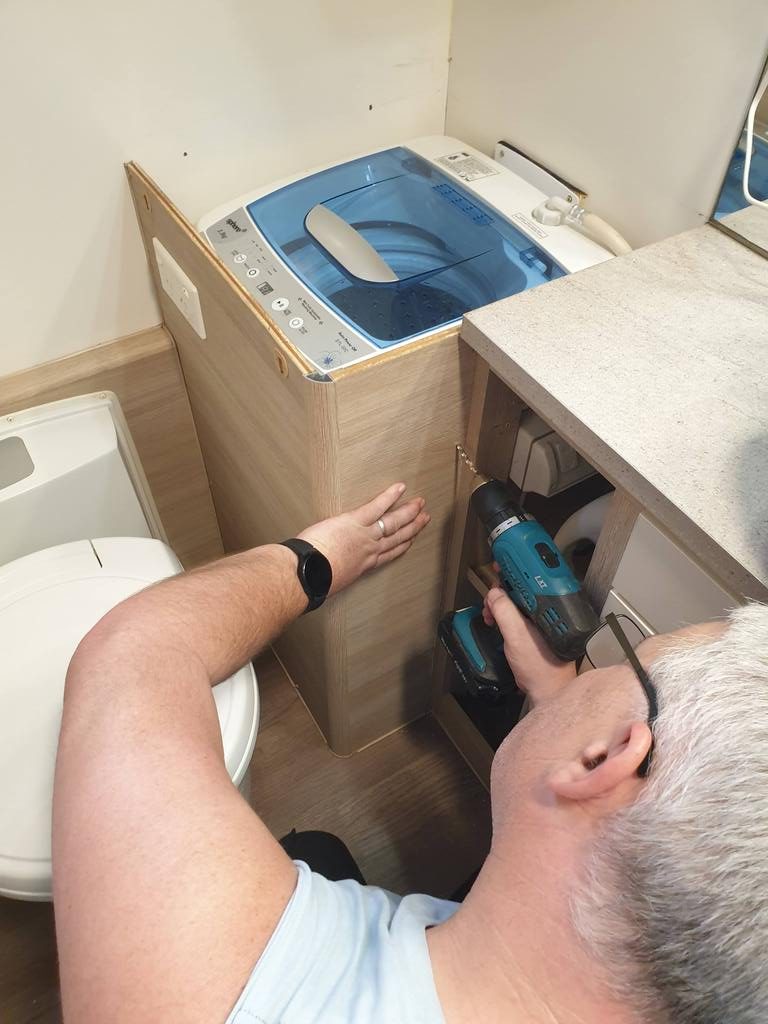
Taking our caravan washing machine out, I wondered if we would have the same issues taking it out next time? To right we would!! That’s why Larry made it future proof. In short, cutting the front of the washing machine cabinetry away with a jigsaw. Then putting it back in place with an easier option to remove it in the future.
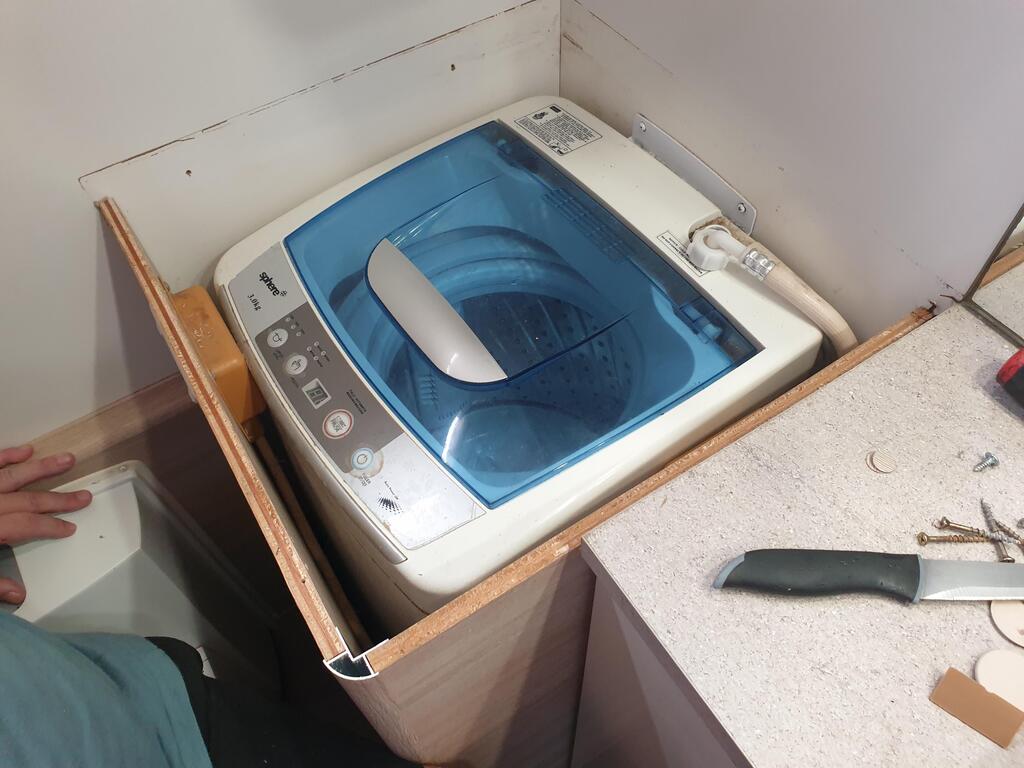
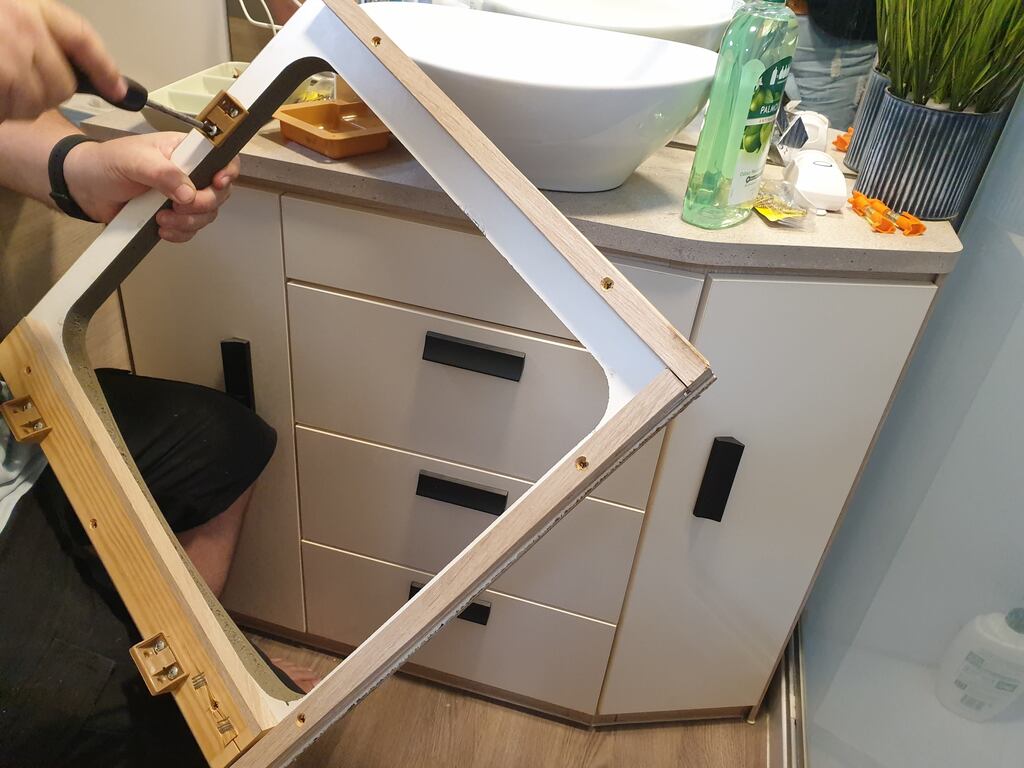
How the?… What the?… Well… we thought it best to saw as near as possible to the attached bathroom sink vanity. Taking the nearest vanity door off and hoping the cut would ultimately be hidden behind it.
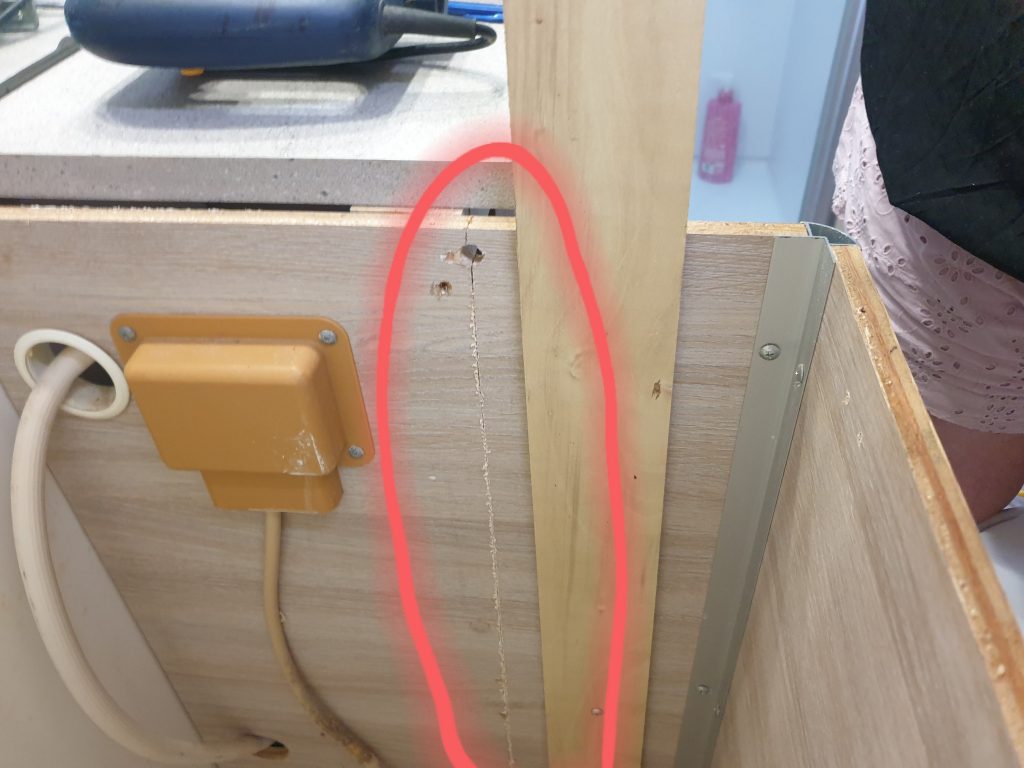
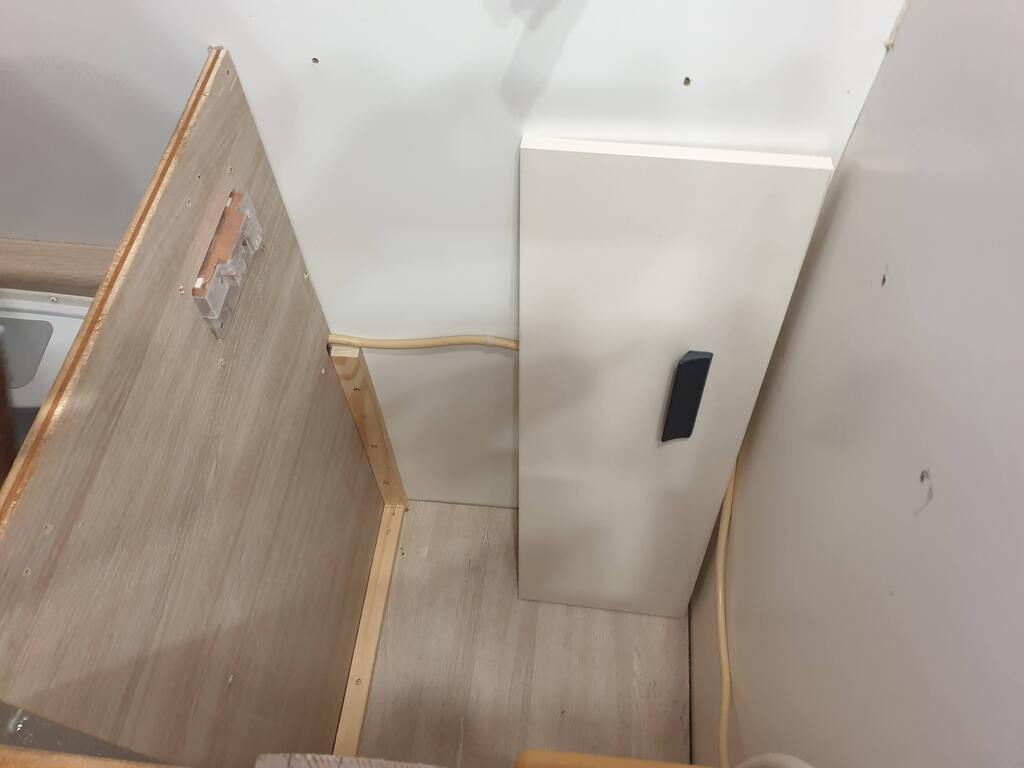
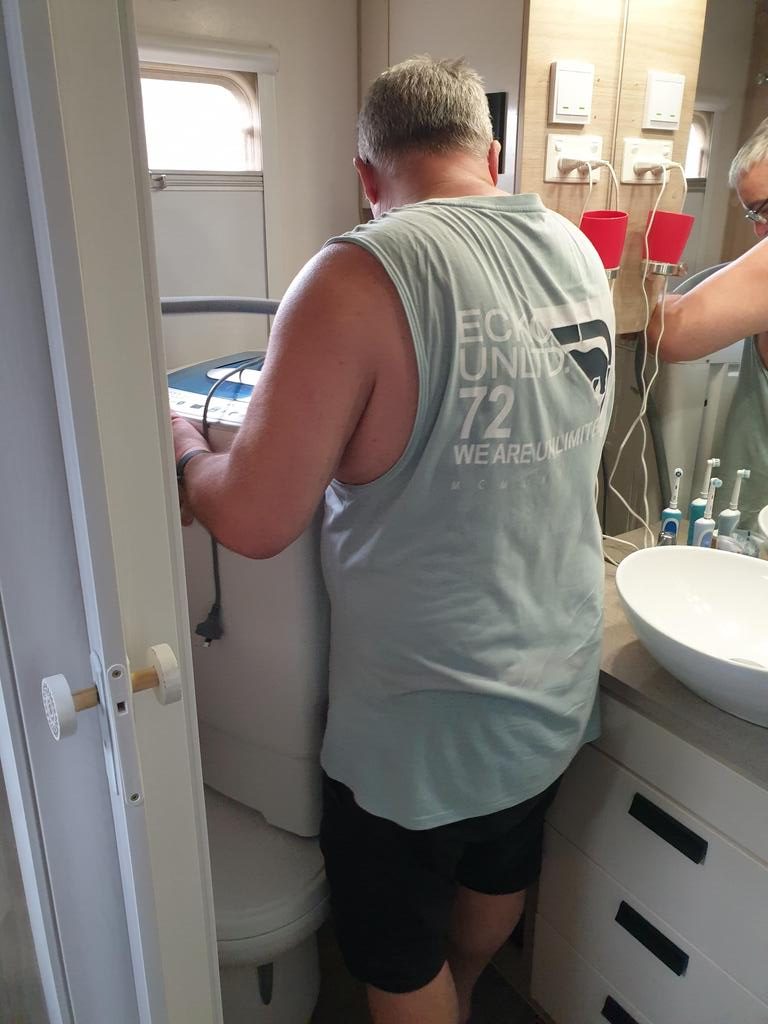
To attach the vanity side of the cabinet back on, Larry decided to screw a piece of wood on the inside. This was to attach the side of the washing machine cabinet back on to the bathroom sink vanity. After attaching the wood to the vanity on the inside, the washing machine cabinetry could be put back in to place.
Then, when we’re ready to put it all back together, Larry can attach the washing machine cabinetry to the wood from the outside. This way, we only have to remove a few screws, “that we can actually get to”! And, they will also be hidden behind the vanity door.
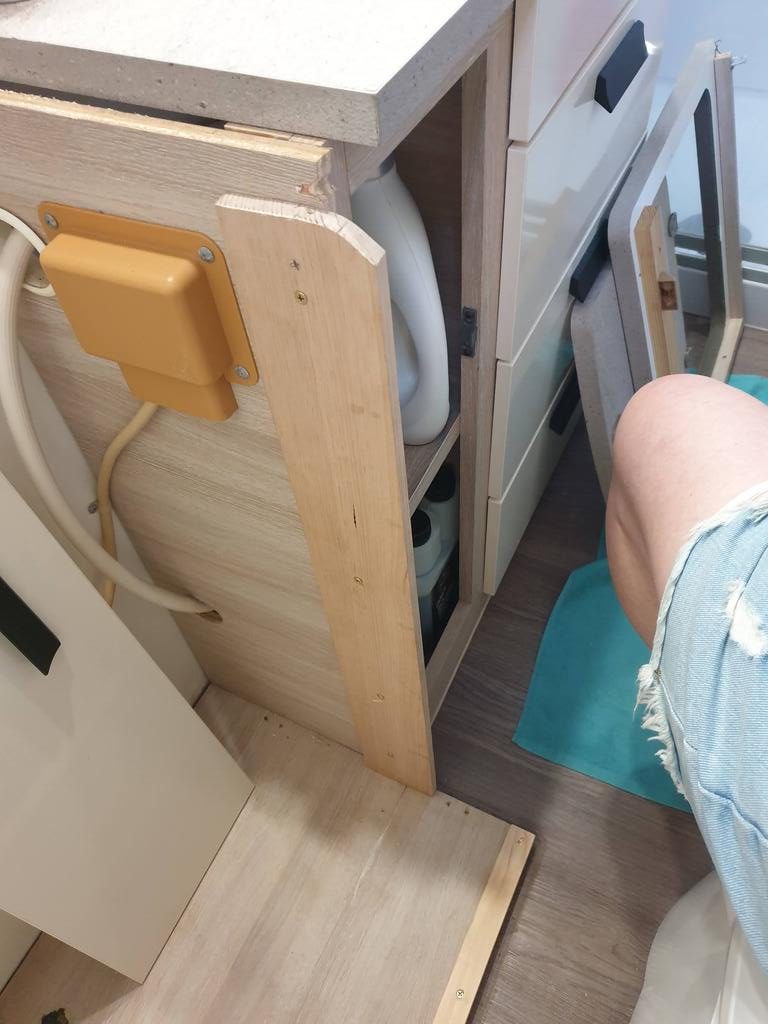
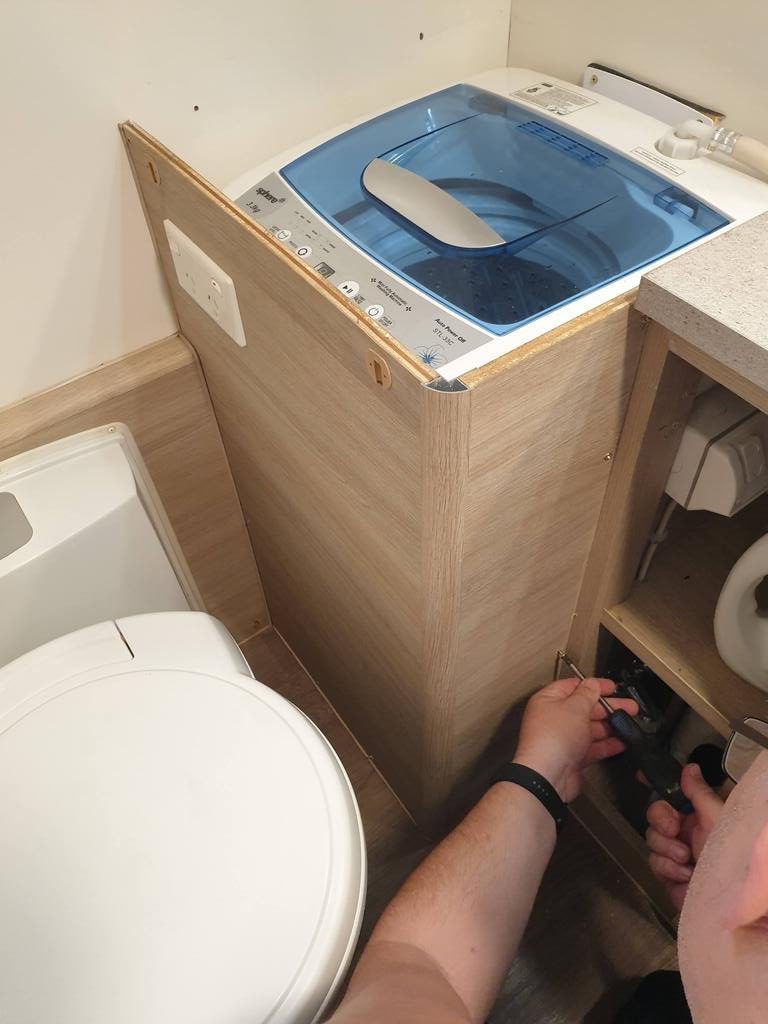
Re-attaching the side to the back of the toilet and outside wall was a different story. Here we got some wood and cut it to fit down the outside wall and on the floor. The washing machine cabinetry would slide between the back of the toilet and this wood, keeping it in place. Ultimately, we would not have to use any screws to attach this side again.
In the below photo, you can also see that the existing wiring has been redirected from around the front cabinet panel to around the side and back wall. This also allows us to remove the washing machine without cables being in the way. However it does mean the front power point is no longer connected, but that’s a small price to pay.

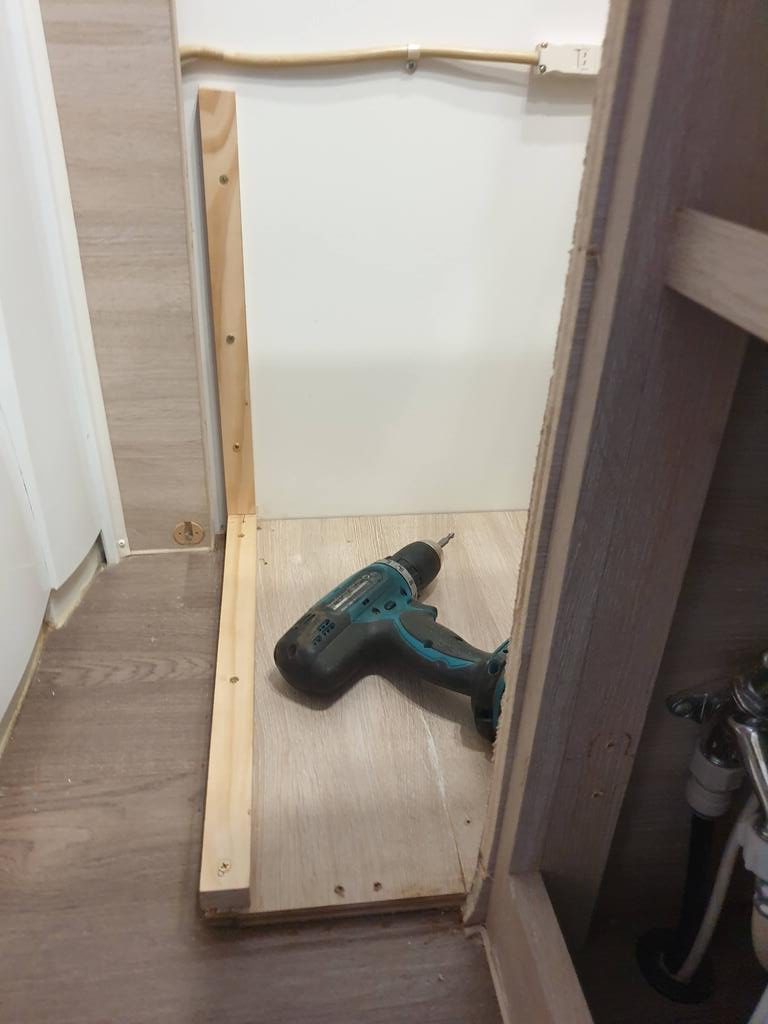

The wood that was cut for the bottom, would be used to attach a couple of screws on the outside. Again, easier for taking our caravan washing machine out, if we needed to remove it again. Note: our washing machine area has an extra piece of wood above the floor, that the machine sites on.
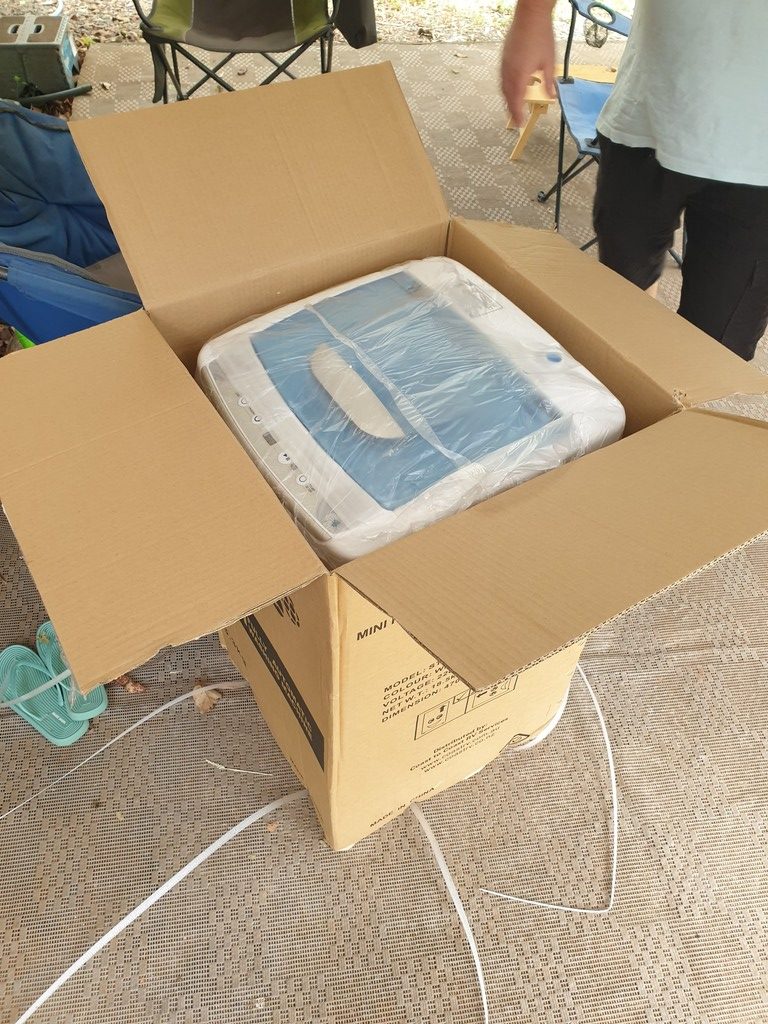
Our 3.3Kg Sphere caravan washing machine arrived in about a week. To be exact, it arrived at our near by post office, which is where we picked it up from. On a side note, Australia Post is great for full time travellers who need to order things online or to receive mail. Just get them to send the item to your designated post office at your designated destination.
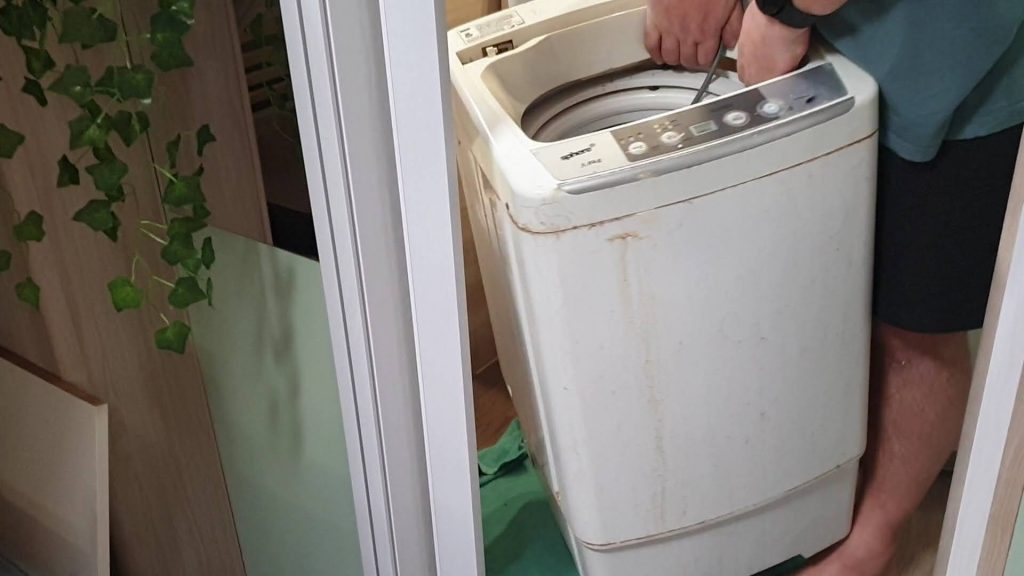
Unboxing our new machine, it seemed so small and clean compared to the old one. In fact it was perfect.
Taking our caravan washing machine out and preparing the space made it easier for us to bung the new one in. In saying that, we still needed to prepare the new washing machine. The new one came with a base cover, which Larry attached. Maybe that’s what was broken at the bottom of the old one?
Larry then attached the old metal bracket to the back of the new machine. This is to keep the machine in place and to stop the washing machine rattling to much.

When putting the new Sphere washing machine in and adjusting the foot to make it level, the bracket didn’t touch the wall. Larry added a spacer in the form of a piece of wood which filled the gap nicely.
After the machine was placed in to it’s new home I could see what a great idea it was to add the wood to the floor and to the vanity Cabinet. It was going to be so much easier to re-attach the frame.
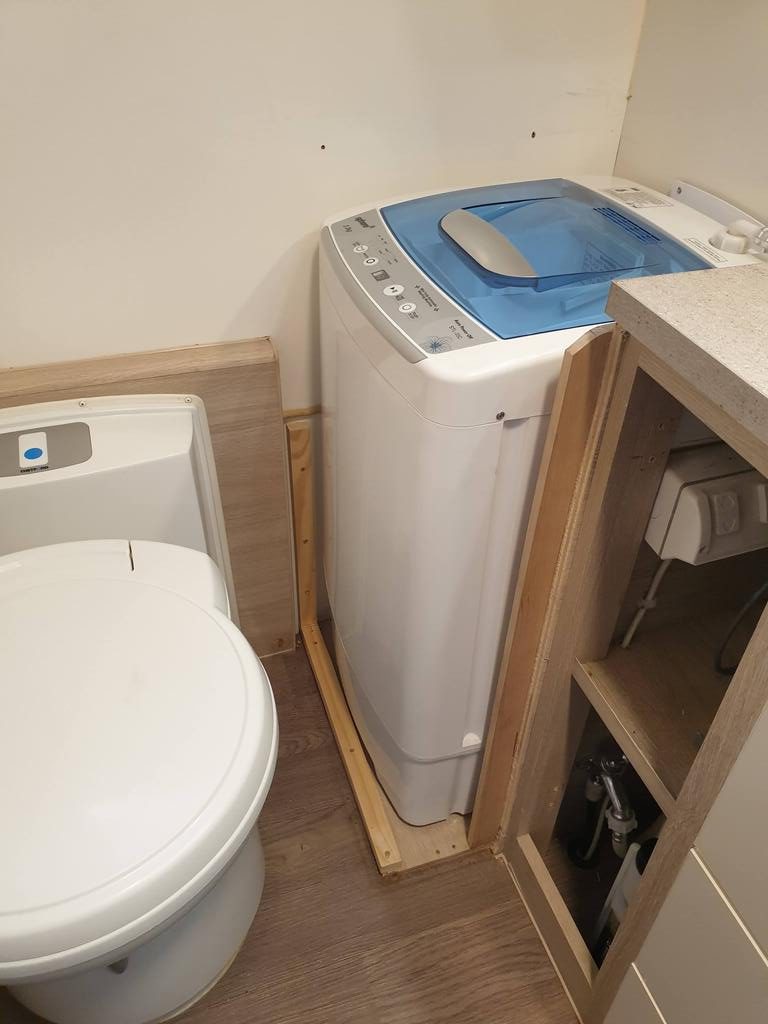
Larry slid the front of the washing machine Cabinet back in to place. The side by the wall fitted nicely between the wood Larry had attached and the back of the toilet. And, the front and vanity side, matched nicely to the wood he had attached.
Holes were drilled in the bottom of the Cabinet as this was going to screw in to the new wood on the floor. After removing this and taking our caravan washing machine out, it could now get put back in to place.
Larry screwed one side to the vanity with the new piece of wood he had put in place. He had placed the screws as near as possible to the vanity so they would be hidden behind the door we had taken off. Once that was in place Larry added a few screws in to the bottom making it secure.
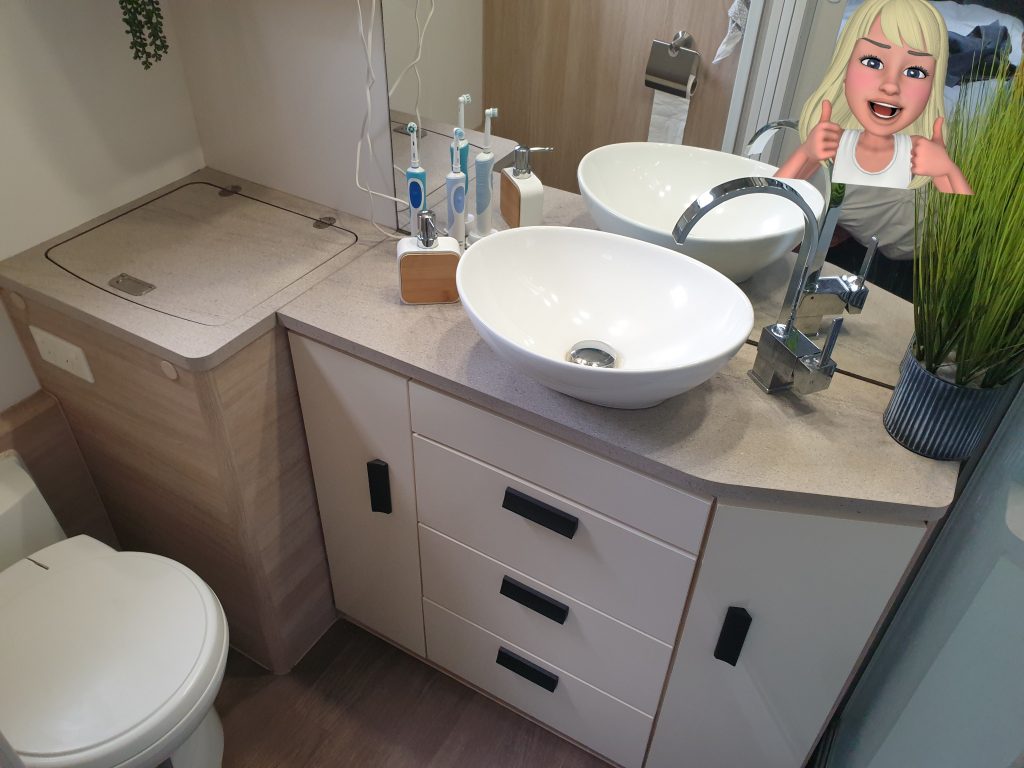
As you can see, once the vanity door was put back on, you can barely see the screws behind the door. Much like the floor screws.
Lastly, we re-attached the top of the washing machine vanity and the lid.


To wrap this post up. Next time we have to take our washing machine out, it will be 100% easier. All we have to do is:
That’s it!!
Aussie House Sitters are our choice of house sitting sites. Use our Coupon Code “AHS15%off” for 15% off your joining fee


3 thoughts on “Taking Our Caravan Washing Machine Out”
Good job Larry. The master of house must be very happy. Tell is it your job to know how to use it. We don’t have a machine in our van but Gaye seems to do a fine job.
Larry I feel for you as I watched jayco Coffs take ours out and repair,it was a day job then test it, you have done well and we would not be without ours, Thankyou for noting what is involved it does mean a lot to us that live in a van full time. Merry Christmas to you and Sue safe travels.
Kev and Tracey Howe
Hi Kev and Tracey,
Wow, a day job. Isn’t it amazing that they make it so hard to get to. I recon they should actually talk to real caravaners, like us full time travellers, when designing vans. We all see what works and what doesn’t.
Larry did an awesome job putting it all back together and making it easier to remove next time 🙂
Marry Christmas to you and Tracey
Cheers
Sue
Comments are closed.